When we hear the word “remittance”, we usually think of people counting their money at a Western Union outlet or something similar. However, with the advent of the Internet, online money transfer services began to gain popularity among those who wanted the ease, speed and convenience of the Internet. One of them is Wise (formerly TransferWise).
Wise was founded in 2011 by two friends from Estonia who were tired of high transaction fees and lousy exchange rates. Wise now handles $5 billion worth of transactions every month for more than 7 million customers, including thousands of overseas Filipino workers (OFW) who want to save money on remittance fees.

What makes Wise different from most other online money transfer services is that it uses real foreign currency exchange rates. Other money transfer and online payment companies like PayPal make their money by slashing exchange rates on top of their transaction fees. Wise differs in that it uses actual foreign currency exchange rates, so your dollars or euros will mean more to your recipient.
With transparent pricing, real exchange rates, and low transaction fees, it’s no surprise that Wise has quickly become the go-to money transfer service for many people around the world. People who live and work in the United States, Europe, and other countries in Asia can send money at lower rates than banks and other money transfer companies. In fact, Wise is eight times cheaper than a bank transfer.
So if you’re looking for a faster and more affordable way to send money around the world, you might want to consider Wise. Unlike Western Union or MoneyGram, Wise is simply an Internet-based service where transactions are made using your computer or mobile phone. You don’t need to visit a remittance center and give your money to the cashier. All you need is a bank account or debit or credit card and you are good to go.
How to Send Money Using Wise (formerly TransferWise)
Step 1: Register a free account by providing your email address, password and country. After registering, check your email and click on the link to confirm your email address.

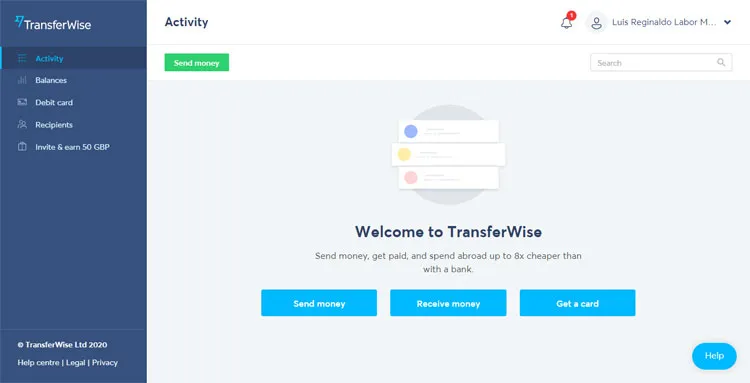
Step 2: On your Wise dashboard, click the “Send money” button.
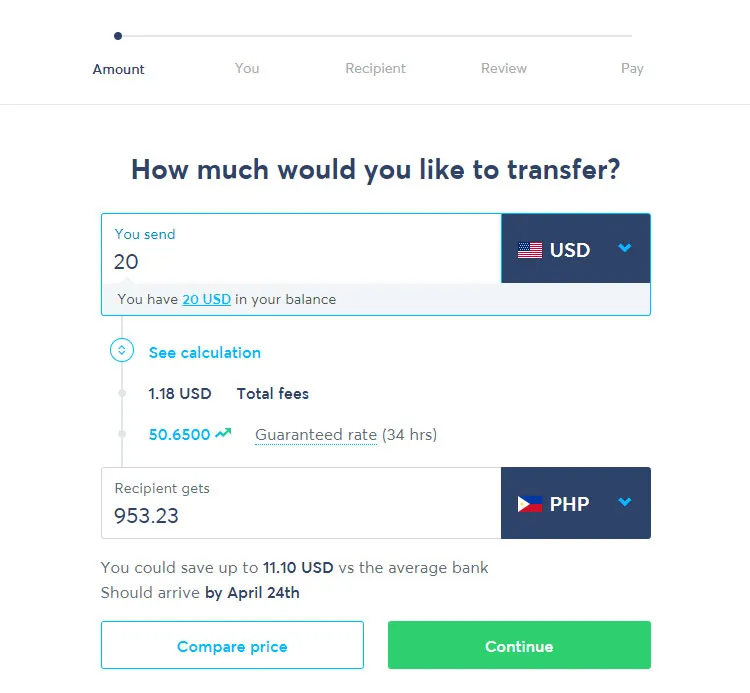
Step 3: Enter the amount you want to transfer. Make sure you select your preferred currency. You can already see the conversion rate and total cost.
Click “Continue” when finished.
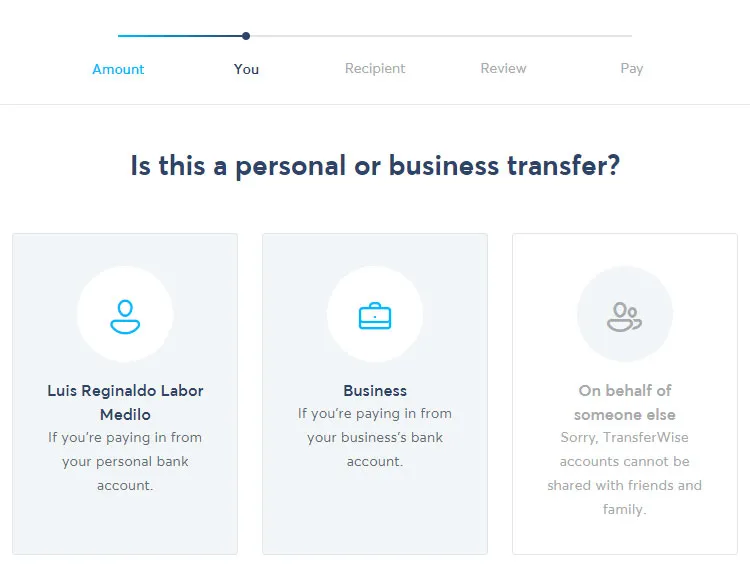
Step 4: Choose whether it is a personal or business transfer. Select “Personal” (or your name) if you’re paying from a personal bank account.
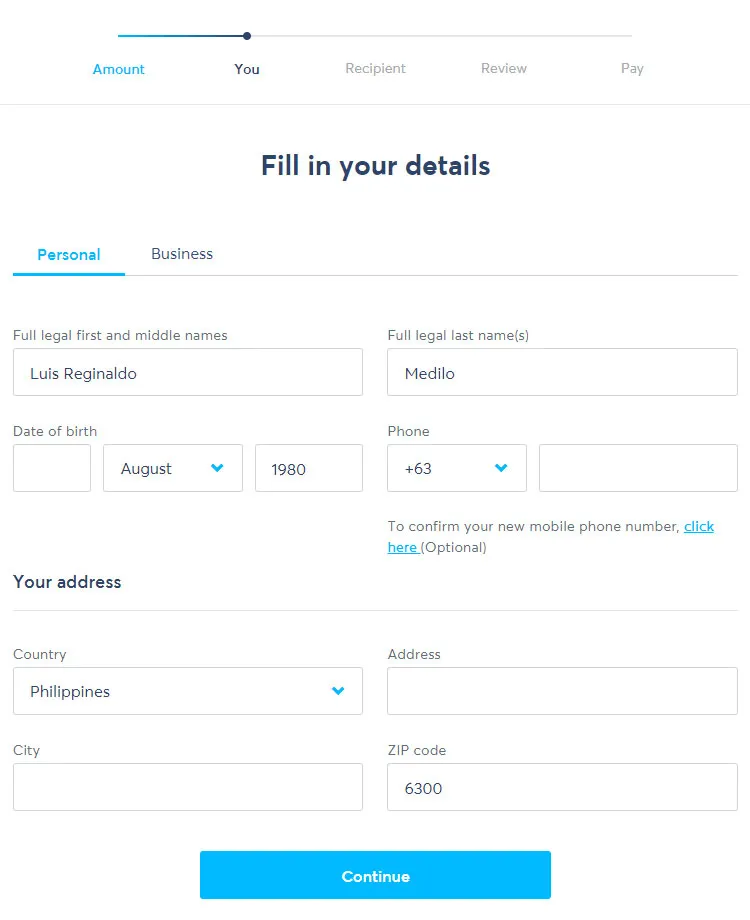
Step 5: Enter your details like full name, date of birth, phone number and address.
Click “Continue” to continue.
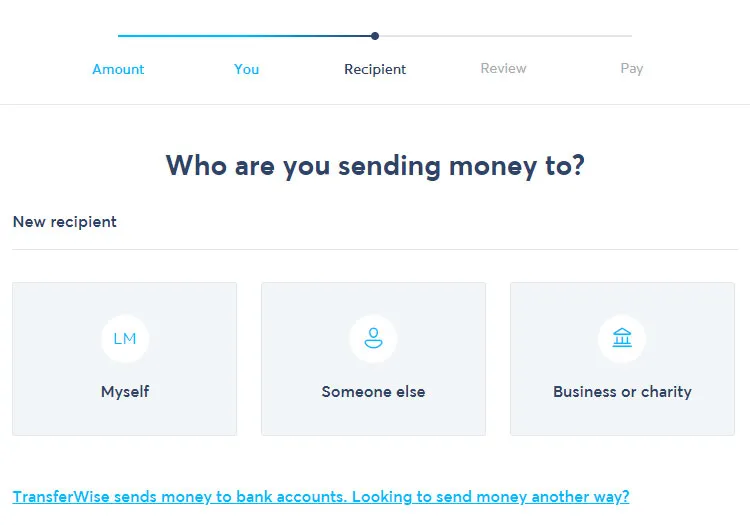
Step 6: Choose who you want to send money to, whether “Myself“, “Someone else“, or “Business or charity”. Select “Someone else” if you want to send money to another person.
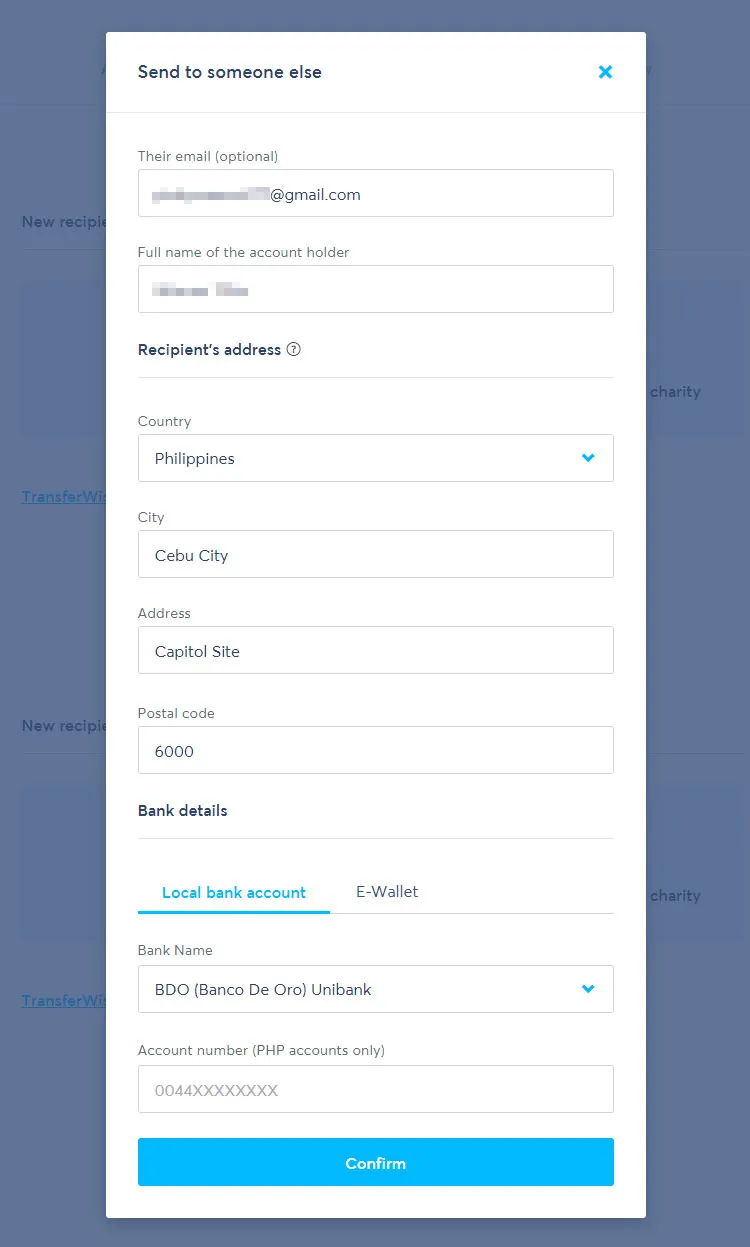
Step 7: Enter your recipient details, including full name, email, and address.
In the “Bank details” section, select your beneficiary bank and enter the account number. If you want to send money to a mobile wallet, click the “E-Wallet” tab, select GCash or PayMaya, and enter the recipient’s e-wallet number.
Click “Confirm” when finished.
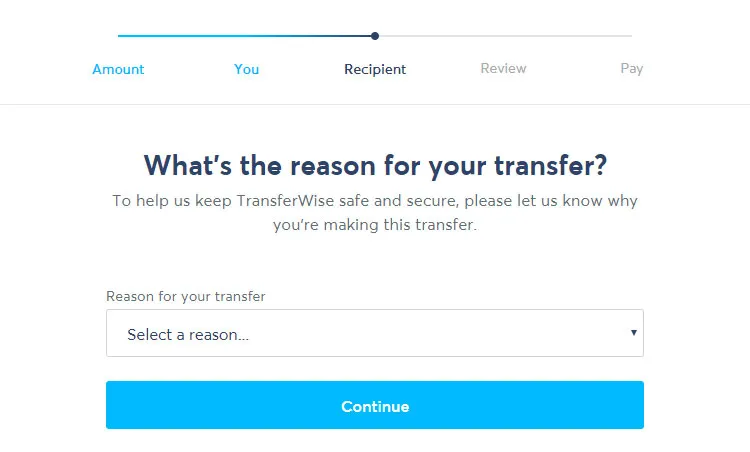
Step 8: Select the reason for the transfer in the dropdown box. Click “Continue“.
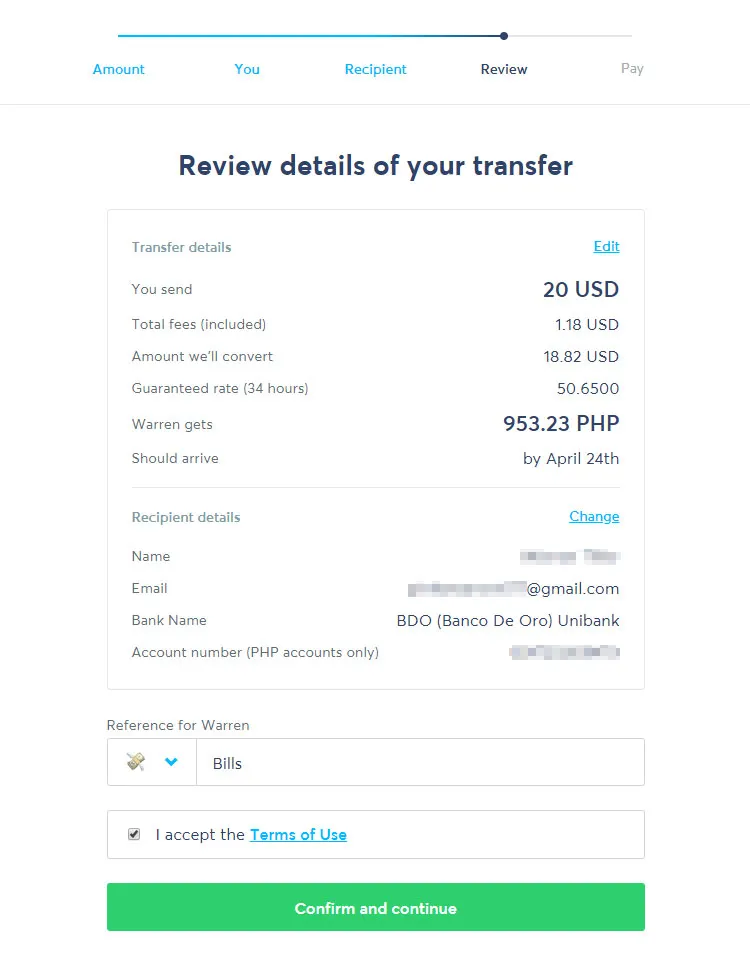
Step 9: Review your transfer details to ensure they are correct and accurate. Check the box “I accept the Terms of Use” and click “Confirm and continue“.
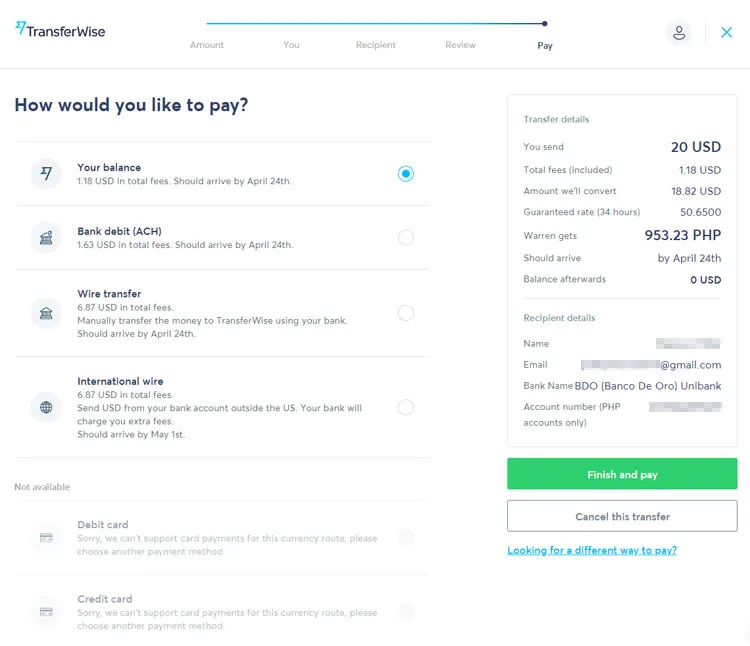
Step 10: You can now choose from any of the following payment methods:
- Bank debit (ACH) – Wise will pull the funds directly from your bank account via the Federal ACH network.
- Wire transfer – Manually transfer the money to Wise using your bank account.
- International wire – Send money from your bank account outside the US. Your bank will charge you extra fees.
- Debit card – However, you can add money to your balance using your debit card.
- Credit card – You can instead add money to your balance using your credit card.
- Your balance – Open a multi-currency account and add funds to instantly pay for transfers.
For international wire transfer, you will have to manually transfer the money to Wise’s bank account in the United Kingdom. The International Bank Account Number (IBAN) and the bank code (BIC/SWIFT) will be provided. You can use your bank’s online banking or mobile app to make the wire transfer. Take note that the SWIFT system and/or your bank may charge additional fees.
Alternatively, you can sign up for a free multi-currency account which will allow you to add money to your Wise balance for quick and easy payments. With an unlimited account, you don’t need to do a bank debit or wire transfer every time you want to send money. You simply add money to your balance using your bank, debit or credit card.
Step 11: Enter your password to approve the transfer.
Wise will now start transferring money to your recipient’s bank account or e-wallet. You and your recipient will receive emails once the transfer has been processed.
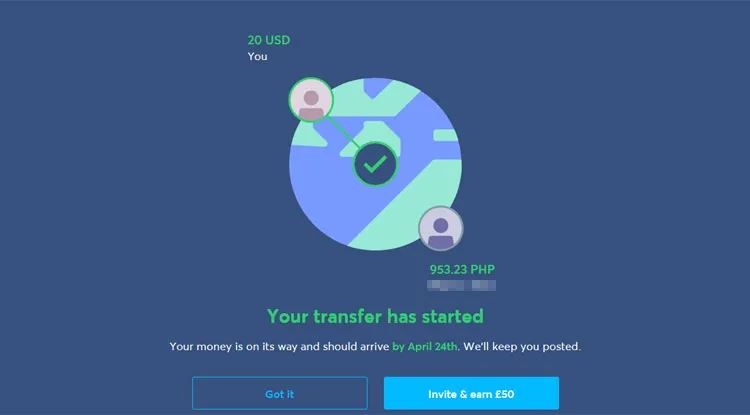
Depending on your payment method, the money should arrive within minutes or hours. Some banks may take longer to process transfers. If you paid by international transfer, it can take up to a week for your transfer to complete. You can track your transfer by logging into your Wise account or by clicking the link in the confirmation email.
Supported Banks
These are local banks where you can transfer money from Wise:
- AMA Bank
- ANZ Bank
- Allied Bank
- Allied Savings Bank
- Asia United Bank
- BDO (Banco De Oro) Unibank
- BDO Network Bank (One Network Bank)
- BPI Family Savings Bank
- Bangkok Bank
- Bank of China
- Bank One Savings and Trust Corp.
- Bank of Commerce
- Bank of Tokyo
- Bank of the Philippine Islands (BPI)
- CTBC
- China Bank Savings
- China Banking Corporation
- CitiBank Savings
- Citibank
- City Estate Savings Bank
- City Savings Bank
- Deutsche Bank
- Development Bank of the Philippines (DBP)
- East West Bank
- Equicom Savings Bank
- Far Eastern Bank
- Filipino Savers Bank (A Rural Bank)
- First Allied Bank
- First Consolidated Bank
- First Macro Bank
- Guagua Savers Bank
- HSBC Savings
- Hongkong and Shanghai Bank (HSBC)
- International Exchange Bank
- Islamic Bank (Al-Amanah Islamic Investment Bank)
- Land Bank of the Philippines
- Luzon Development Bank
- Malayan Bank
- MayBank Philippines
- Metropolitan Bank and Trust Company (Metrobank)
- Pen Bank
- Philippine Bank of Communications (PBCOM)
- Philippine Business Bank
- Philippine National Bank (PNB)
- Philippine Savings Bank (PSBank)
- Philippine Trust Company
- Philippine Veterans Bank
- Planters Bank
- Postal Bank
- Premiere Bank
- RCBC Savings
- Rizal Commercial Banking Corp. (RCBC)
- Robinsons Savings Bank
- Security Bank Corporation
- Security Bank Savings
- Standard Chartered Bank
- Sterling Bank
- Tong Yang Savings Bank
- UCPB Savings Bank
- Union Bank of the Philippines
- United Coconut Planters Bank (UCPB)
- United Overseas Bank
- University Savings Bank
Apart from these banks, you can also transfer money to e-wallets like GCash or PayMaya.
Conclusion
Wise is just one of several remittance services used and OFWs to send money to their families and loved ones back home. There is Western Union for reliable money transfers from anywhere in the world. But if you want a faster and cheaper way to send money , you can’t go wrong with Wise. With Wise, you can potentially save thousands of pesos each month in transaction fees, and you don’t even have to go to a remittance center.
credits to techpilipinas.com

