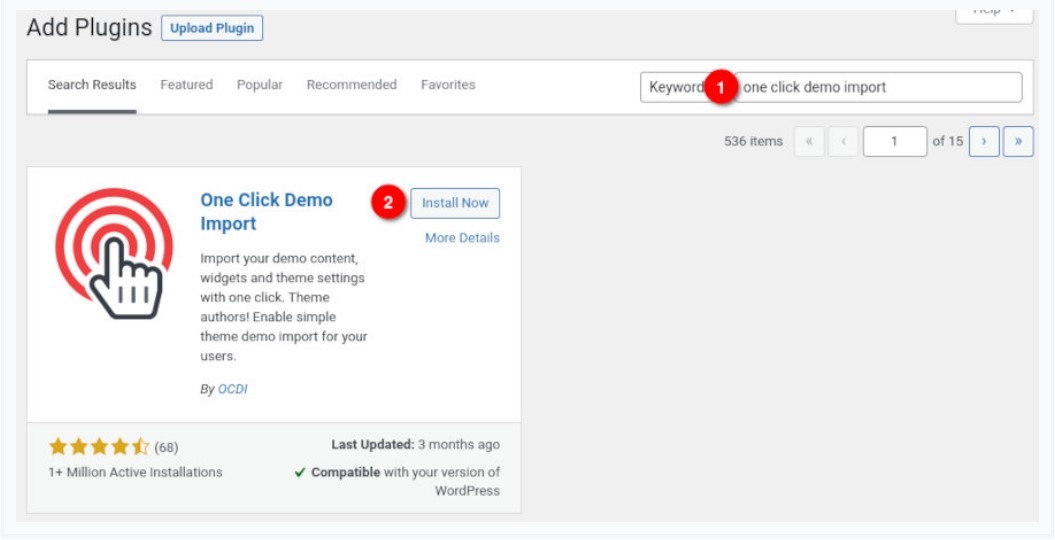
To automate the process of importing and for a better experience we have natively included support for theOne Click Demo ImportPlugin
Installing the Plugin
From your WordPress dashboard

VisitPlugins→Add Newand
- Search forOne Click Demo Importand install the plugin.
- Install and ActivateOne Click Demo Importfrom your Plugins page.
Since modern WordPress themes are getting more robust and complex, it’s necessary to release more power from the server. You can achieve this by editing the php.ini file or asking your hosting provider to do this for you.
We recommend the following settings:
max_execution_time = 300; memory_limit = 128M; upload_max_filesize = 128M; post_max_size = 256M;
Installing Sample Content
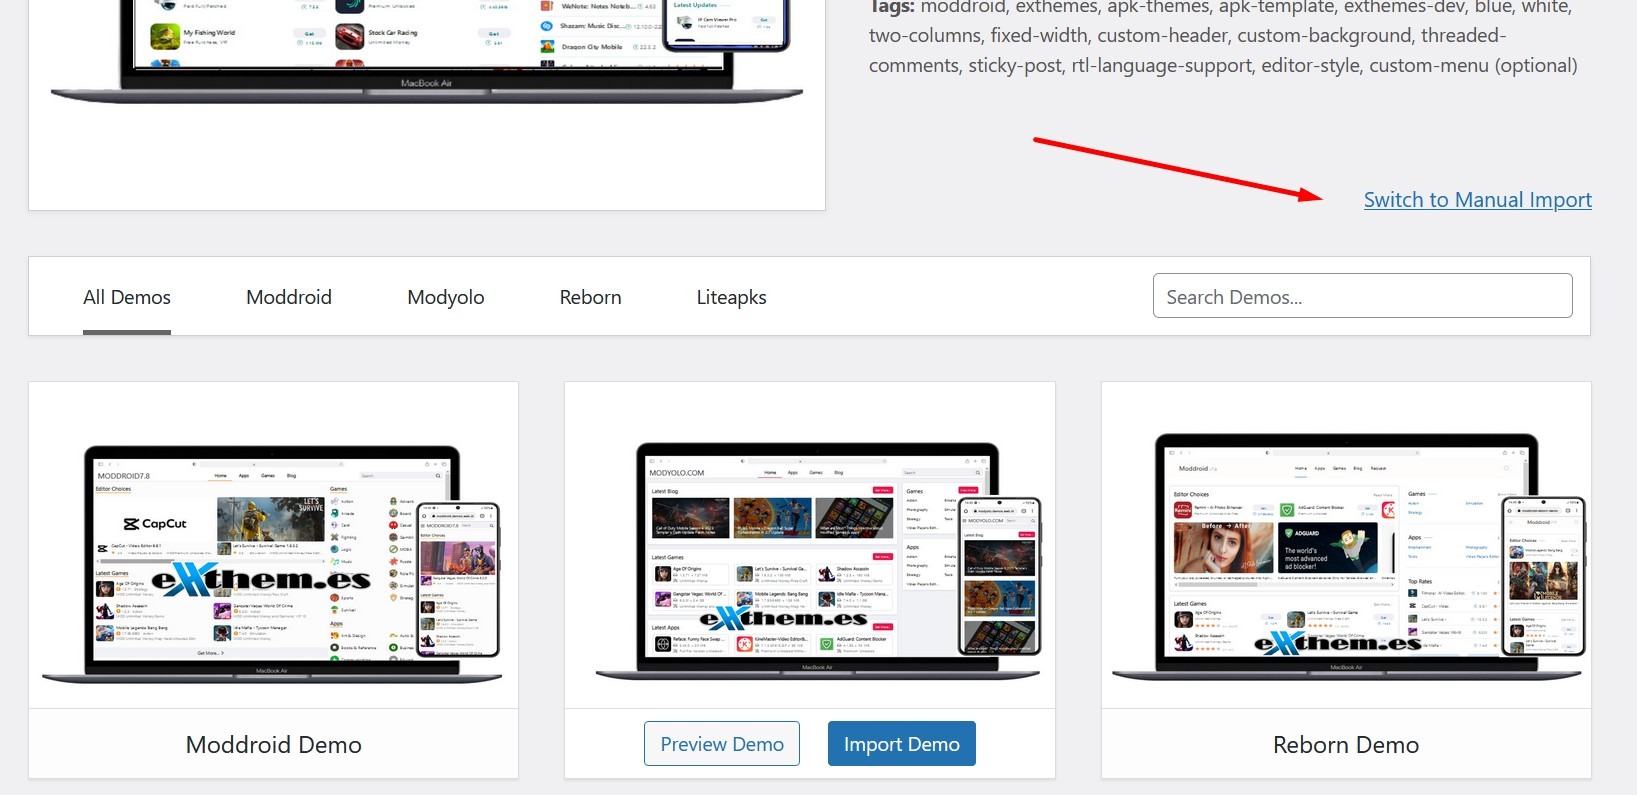
Once the plugin is activated you will find the actual import page inAppearance→Import Demo Data.

Click onSwitch to Manual Importyou can see on image.

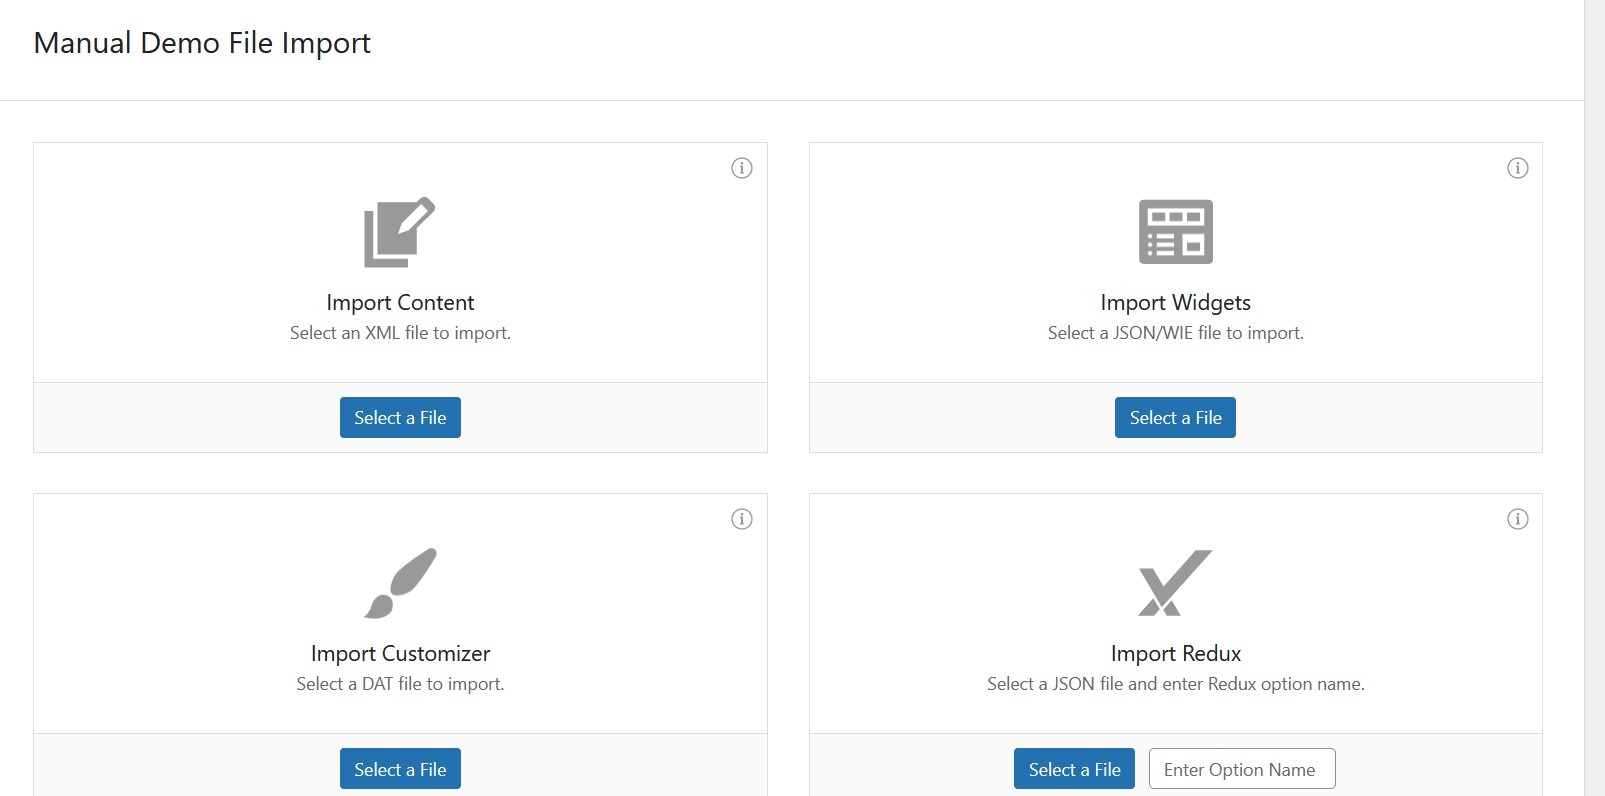
after you click you can see like this.
- Import Content– select filecontent.xmlon folder demo (You will need a File and the Extension of the File is.xml)
- Import Widgets– select filewidget.wieon folder demo (You will need a File and the Extension of the File is.wie)
- Import Customizer– select filecustomizer.daton folder demo (You will need a File and the Extension of the File is.dat)
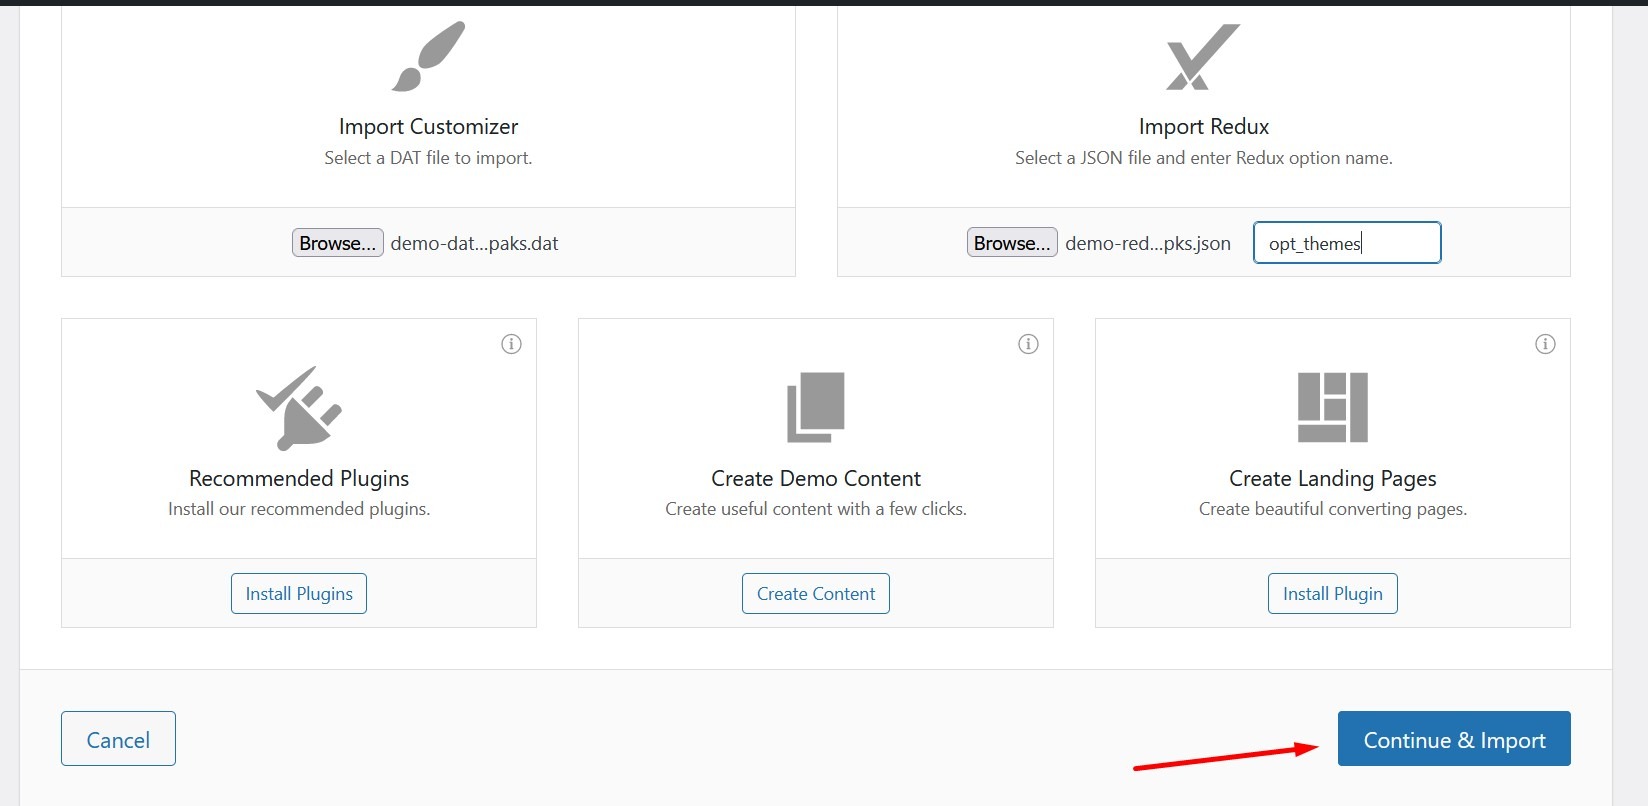
- Import Redux– select fileredux.jsonon folder demo (You will need a File and the Extension of the File is.json) and putopt_themes
after you input all file, next clickcontinue & importand wait finish installation.
If you require any further assistance pleaseContact Herewith theSite URL, One TemporaryAdmin IDandPasswordof your WordPress Dashboard.

